Introduction:
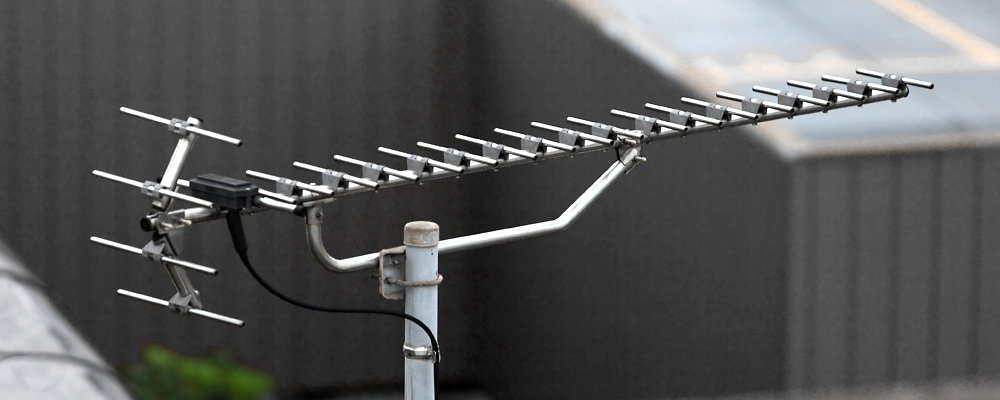
In telecommunication technology, antenna is the key element from transmitting data wirelessly. One of those kinds of antenna was the Yagi Uda antenna (the one on the cover picture) that most of us probably saw on some of the roof tops of any Cambodian household. I won't explain much about the antenna, but the most important feature on the Yagi antenna is its range and performance improvement over conventional antenna. More information can be found here.
credit to the original video: Kreosan
In this project, we are going to recreate the antenna design from Kreosan YouTube video as shown in Figure 2. The material used in this project will be different from the video since the material sourced here is very expensive. After assembling the antenna, we tested its connection with ESP32 by comparing the Wi-Fi and its RSSI found using the conventional dipole antenna and the Wi-Fi gun.
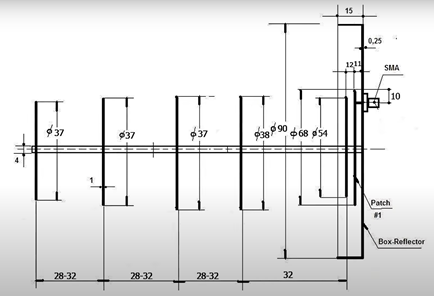 |
Figure 2. Shows the design from
Kreosan video |
Assembling the Wi-Fi gun:
How are we going to do this?
Table-1: component list for the
antenna system

Using the references design from
Kreosan, we were able to sources out several component including the treaded
shaft and nuts. However, copper plates was a difficult material to find in the
market. As mentioned in the video, the material of the plates does not matter. Our first try with Soda can was not very successful as shown in fig_3, the
soldering does not stick to the aluminum very well. As the result, Zinc roof
tile was use instead.
 |
Figure
3. Attempt on soldering on
Aluminum Can |
Assembling antenna?
There are several operations need to
assemble the antenna including measuring, cutting, grinding and soldering.
First, we measure out the dimension of the plates for the director arrays plate
and reflector. The easiest way to do this is by using a compass and a marker.
After that we can measure the length of the bolts. We measured out 26cm for the
bolt to leave some room for additional arrays. Furthermore, we use a gardening scissor
to cut of the plates and a grinder to cut the bolt as in Fig_4. Finally, we
solder in the striped coaxial cable as in Fig_5. The inner core of the cable
connected to the 68mm plate, and the ground are connected to the reflector.

Testing Wi-Fi gun performance:
To test the performance of the antenna, we are going to use ESP32 to scan all the Wi-Fi signal (RSSI) before and after we connect the Yagi antenna. The code for the ESP32 were extracted from OpenLabPro, which constantly checking the Wi-Fi signal and output them to the serial monitor.

The First experiment with its default antenna as shown in Fig-7 above. The result from the dipole antenna was expectedly low with the neatest Wi-Fi signal can only get up to -68dB. As shown in Fig-8 there are only 6 networks found on average using the default antenna.

2. Wi-Fi Gun

As soon as the new antenna is connected, there are additional signal found and with better performance. MTech_Solution’s RSSI increased by twice from -68dB to -38dB. Same improvement can be see through other signal. Moreover, ten more Wi-Fi signals are found with the new antenna. Since the antenna is directional, any tilting of the antenna will produce different result.

Conclusion:
The antenna performance was better than the default antenna by a margin, as shown in the result. The only notable disadvantages are its size and weight. However, the optimal performance is yet to be found as the impedances of the antenna is unknown. As the result, a matching circuit need to be design for this antenna to improve its performance.


